Create a Nuxt.js blog with the content module
May 7, 2022 ‐ 18 min read
Let's start with a disappointing disclaimer; I'm not using Nuxt.js to run my blog, currently I use the static site generator Zola. I did use the Nuxt content module to set up a blog for a different project though.
Although the documentation of nuxt/content is fine, it does leave some practical topics uncovered. I hope to help with some of them here in this manual.
The final (but unstyled) version is available on my GitHub: koenwoortman/nuxt-content-blog-template
You can preview the final version at Netlify here.
Introduction
At the time of writing Nuxt v3 does not yet have a stable release, therefore I will just stick to Nuxt v2. I assume most of the code will be easily adjustable to fit in your Nuxt 3 project in the future.
Besides other file formats, the content module allows you to publish web pages from Markdown files. Markdown being the most suitable of the supported file formats I'll just focus on that here.
Markdown is a plain text markup language that can be compiled to HTML. It has the benefit over HTML of being fairly readable without the HTML tags.
To provide some extra meta data to your blog posts you can start your Markdown files with a block of YAML code, called Front Matter. We'll use that extensively here too. The Front Matter YAML block should always start on the first line of of your Markdown blog post, see the following example:
---
title: "My First Blog Post"
---

Hello World
All together this allows you to set up a file based headless CMS, which you can host freely on platforms such as Netlify or Vercel. But we will get into deployments later.
Getting started
If you create a new Nuxt project from scratch with create-nuxt-app, which is what I will do here, the installer prompts you for whether the content module should be added. I am happily adding the content module in this way.
$ npx create-nuxt-app nuxt-blog
create-nuxt-app v3.7.1
✨  Generating Nuxt.js project in nuxt-blog
? Project name: nuxt-blog
? Programming language: JavaScript
? Package manager: Npm
? UI framework: None
? Nuxt.js modules:
 ◯ Axios - Promise based HTTP client
 ◯ Progressive Web App (PWA)
❯◉ Content - Git-based headless CMS
If you already have an existing Nuxt project however you can add the content module by running an NPM install:
$ npm install @nuxt/content
After this is done make sure to add '@nuxt/content' to the modules in your nuxt.config.js file.
// nuxt.config.js

export default {
  target: 'static',
  ...
  modules: [
    '@nuxt/content',
  ],
  ...
}
Besides that I am going to assume here that the build target is set to 'static', this allows us later on to host our blog as a static site (Jamstack).
To keep things simple I removed a couple directories from the Nuxt project root such that is looks like the following:
.
├── content
│   └── hello.md
├── nuxt.config.js
├── package.json
├── package-lock.json
├── pages
│   └── index.vue
└── static
    └── favicon.ico
If you just scaffolded your project with the create-nuxt-app command the content folder should be present, if not go ahead and create it manually.
The content module looks for files in the content/ directory in our project root, so make sure that it is present.
Now that has been taken care of, let's continue by displaying a list of blog posts.
Start with a list of posts
To display a fairly basic and not styled list of blog posts you may add the following code to the pages/index.vue file.
<!-- pages/index.vue -->
<template>
  <ul>
    <li v-for="post in posts" :key="post.slug">
      <nuxt-link :to="`/${post.slug}`"> {{ post.title }} </nuxt-link>
    </li>
  </ul>
</template>

<script>
  export default {
    async asyncData({ $content, params }) {
      const posts = await $content().fetch();
      return { posts };
    },
  };
</script>
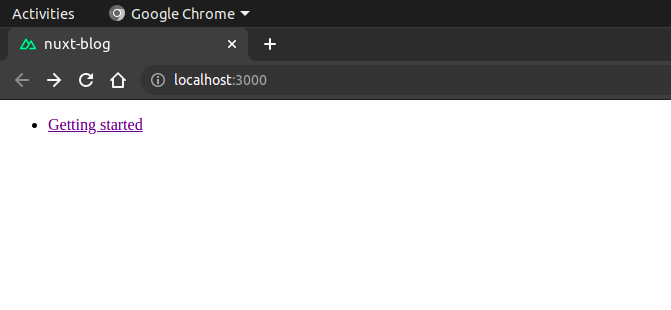
Without any CSS styling this looks like the following, not very pretty but it gets the job done. I will leave the styling up to you.

I understand this requires some explaining. First we want to fetch our Markdown content in the asyncData hook from Nuxt so that we get our content before the page is rendered.
asyncDatais a hook provided by Nuxt that is only available on pages. Generally you use it for data fetching, the return value will be merged into the normal Vue local state of your component.
We fetch the content via the content module which is available to us as $content, the .fetch() method call speaks for itself.
Second, you may have noticed already that we make use of the .slug and .title properties of our blog posts, but where do they come from?
Besides the variables that we can define ourselves in the Front Matter of our blog posts, Nuxt content injects some variables itself. You can find a list of these variables here. One of these injected variables in the slug.
By default the slug is set to the filename of your Markdown file without the file extension, the slug field is therefore useful to use for the unique URL of the blog post.
The other variable, title, should be defined in the Front Matter of a blog post. I have used the default hello.md file which came with the installation which has the title "Getting started". See below the corresponding Front Matter of this hello.md file.
---
title: Getting started
description: "Empower your NuxtJS application with @nuxt/content module: write in a content/ directory and fetch your Markdown, JSON, YAML and CSV files through a MongoDB like API, acting as a Git-based Headless CMS."
---
Exclude unused fields
The fetch() method includes all the variables for all the posts that are fetched. Currently that is not such a big deal. But if we were to have a couple dozen blog posts with large bodies, this becomes an expansive operation.
Therefore we can limit the variables that we fetch here to only the slug and title. Since this are the only two properties we use in our list of blog posts.
<script>
  export default {
    async asyncData({ $content, params }) {
      const posts = await $content().only(["slug", "title"]).fetch();
      return { posts };
    },
  };
</script>
If you add properties to your list of blog posts, such as the published date or so, do not forget to include them in the array you pass to only(). Otherwise those values will be undefined, hope this saves you some debugging time.
Display a blog post
Now that we got our list of blog posts covered we can focus our attention on displaying single blog posts.
The first thing we need is a new file, I will use the file pages/_slug.vue for this. Meaning that all our blog routes will come directly after the domain, without a blog/, articles or posts/ prefix. Obviously you can do so if you prefer, you should simply create a file pages/blog/_slug.vue instead.
<!-- pages/_slug.vue -->
<template>
  <article>
    <h1>{{ post.title }}</h1>
    <nuxt-content :document="post" />
  </article>
</template>

<script>
  export default {
    async asyncData({ $content, params }) {
      const slug = params.slug;
      const post = await $content(slug).fetch();

      return { post };
    },
  };
</script>
To go over our asyncData() function briefly. We mainly make use of dynamic pages here (pages with names starting with an underscore), the URL parameter name is equal to the file name we used. In our case this URL parameter name is slug.
We use the slug from the URL to fetch the corresponding markdown file from our content/ directory.
Furthermore in our template, all the magic here is provided by the <nuxt-content> component which renders your markdown file.
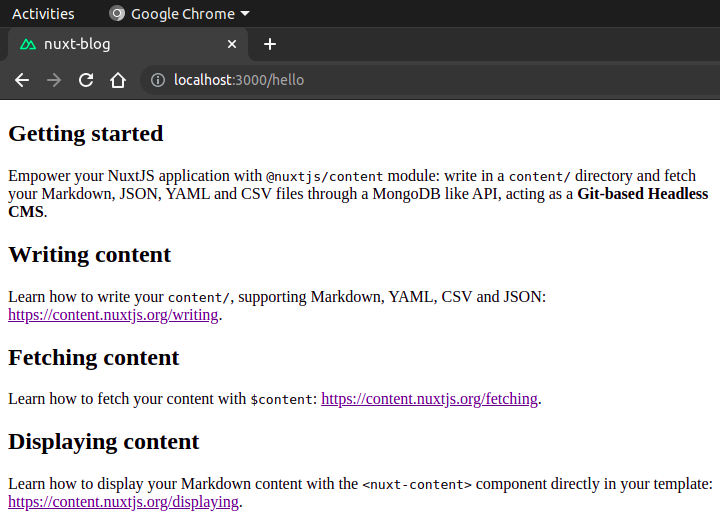
Again, with minimal styling this results in the following page.

Personally I am not a big fan of the live editing feature that is enabled by default. You disable this in your
nuxt.config.jsby setting theliveEditsetting tofalsein theconentconfiguration. See the docs for more information.
Table of contents
With long blog posts, such as this one, a table of contents is convenient for the reader. The content module adds ID attributes to headers. These IDs can be used to jump to an anchor tag on the same page.
The table of contents is available as a property of your post object. By looping over its contents you can add the table of contents to your template as follows:
<template>
  ...
  <nav>
    <ul>
      <li v-for="link of post.toc" :key="link.id">
        <nuxt-link :to="`#${link.id}`">{{ link.text }}</nuxt-link>
      </li>
    </ul>
  </nav>
  ...
</template>
SEO Fields
If you write a blog you probably care about SEO to a certain degree. Adding an HTML title and meta description are high on the list here.
To set HTML head tags in Nuxt you should define a head() method in your page component.
The place to set such variables is most likely in the Front Matter of your Markdown file. The one Markdown file which was added during the installation provided both a title and description luckily:
---
title: Getting started
description: "Empower your NuxtJS application with @nuxt/content module: write in a content/ directory and fetch your Markdown, JSON, YAML and CSV files through a MongoDB like API, acting as a Git-based Headless CMS."
---
The variables from the Front Matter are accessible as properties on the post object. Thus in our head() method we can get their respective values as this.post.title and this.post.description.
Using these values in the head() method is fairly basic JavaScript.
<script>
  export default {
    async asyncData({ $content, params }) {
      const slug = params.slug;
      const post = await $content(slug).fetch();

      return { post };
    },
    head() {
      return {
        title: `${this.post.title} | My Blog`,
        meta: [
          {
            hid: "description",
            name: "description",
            content: this.post.description,
          },
        ],
      };
    },
  };
</script>
Pagination
Next up it is time to add pagination to our list of blog posts, but first I'll add some other blog posts to paginate from some Lorem Ipsum paragraphs. I'll continue with the following seven blog posts.
content
├── aenean-vel-mattis.md
├── donec-elementum.md
├── hello.md
├── lorem-ipsum.md
├── nullam-facilisis.md
├── quisque-a-egestas.md
└── ut-nisl-augue.md
Now that we have some blog posts to paginate on we need to set up a new page template: pages/page/_page.vue.
pages
├── index.vue
├── page
│   └── _page.vue
└── _slug.vue
This is where the refactoring begins.
Fetching posts from a mixin
Both components pages/index.vue and the new pages/page/_page.vue should do practically the same thing. Fetching the blog posts in the asyncData method that is, so it would be great if we could make the code we implemented for pages/index.vue reusable. The approach I'll take here is via Vue mixins.
Mixins are a native Vue feature that allow you to distribute reusable functionalities between Vue components. You can find the Vue documentation here.
For this create a new file in a new utils/ directory, I'll name the file fetchPostsMixin.js. Thus we should be import this file in our components from '@/utils/fetchPostsMixin'.
We move the asyncData method from our pages/index.vue component to this file, pay attention to error which we now destructure from the first parameter too. We will need that later.
// utils/fetchPostsMixin.js
export default {
  async asyncData({ $content, params, error }) {
    const posts = await $content().only(["slug", "title"]).fetch();
    return { posts };
  },
};
Both our pages/index.vue and pages/page/_page.vue components can now be adjusted to use the asyncData method from the mixin as follows.
<!-- pages/index.vue -->
<!-- pages/page/_page.vue -->
<template> ... </template>

<script>
  import fetchPostsMixin from "@/utils/fetchPostsMixin";

  export default {
    mixins: [fetchPostsMixin],
  };
</script>
Extend the asyncData method
Now that we only need to make changes in one method instead of two, lets get to it.
I'll post the entire method first, and explain the lines separately. You can go ahead and copy the following to the file utils/fetchPostsMixin.js.
// utils/fetchPostsMixin.js

export default {
  async asyncData({ $content, params, error }) {
    // We will only show 3 posts per page
    const POSTS_PER_PAGE = 3;

    // Get the page number from the URL, fallback on 1 otherwise.
    const currentPage = parseInt(params.page) || 1;

    // We need the total for pagination.
    const totalAmountOfPosts = (await $content().only([]).fetch()).length;

    // Calculate the last page number.
    const lastPage = Math.ceil(totalAmountOfPosts / POSTS_PER_PAGE);

    // If we try to access a page without posts throw a 404.
    if (currentPage > lastPage) {
      return error({ statusCode: 404, message: "No articles for this page." });
    }

    // We want to skip the right amount of posts
    // so we only grab the posts for the current page.
    const offset = POSTS_PER_PAGE * (currentPage - 1);

    // Fetch the posts for the current page
    const posts = await $content()
      .only(["slug", "title"])
      .limit(POSTS_PER_PAGE)
      .skip(offset)
      .fetch();

    // Return the posts of the current page with
    // some other convenient properties
    return {
      posts,
      totalAmountOfPosts,
      currentPage,
      firstPage: currentPage === 1,
      lastPage: currentPage === lastPage,
    };
  },
};
I hope the constant POSTS_PER_PAGE speaks for itself, so the next line is:
const currentPage = parseInt(params.page) || 1;
Since we named our pagination template pages/page/_page.vue we can access the URL parameter by its name page. However, URL parameters are available to us as a string but we want it as an integer here. For our route pages/index.vue the page parameter is undefined, so therefore we fallback on 1 to display the posts of the first page there.
const totalAmountOfPosts = (await $content().only([]).fetch()).length;
In order to calculate what our last page should be we need the total amount of blog posts. We fetch them without any of their properties (.only([])) to minimize the overhead. Do notice that the promise should be resolved first before we can call .length on the result, that accounts for the extra pair of parenthesis.
const lastPage = Math.ceil(totalAmountOfPosts / POSTS_PER_PAGE);
To get the last page we divide the total amount of posts by the posts we wish to show on a page. We round this number up, to cover the use-case of the last page which might contain less posts.
if (currentPage > lastPage) {
  return error({ statusCode: 404, message: "No articles for this page." });
}
If we try to navigate to an URL with a page parameter higher then the total amount of pages we have no blog posts to show. In such a case we throw a 404 error.
const offset = POSTS_PER_PAGE * (currentPage - 1);
From the second page onwards we need some offset to the blog posts we fetch, otherwise each page would contain the same blog posts. We pass this number to the .skip() method later.
const posts = await $content()
  .only(["slug", "title"])
  .limit(POSTS_PER_PAGE)
  .skip(offset)
  .fetch();
Next is the actual fetching of our blog posts. We added the limit of posts to fetch and skip to a certain offset based on the current page.
return {
  posts,
  totalAmountOfPosts,
  currentPage,
  firstPage: currentPage === 1,
  lastPage: currentPage === lastPage,
};
Finally we return the posts of the current page together with some convenient properties for the pagination.
Make a reusable component
So far we made our asyncData method reusable, so it would be a shame if we would need to duplicate our template. Time to make a component for this, I'll call it components/PostsPage.vue and you can see the code below. This is also where the extra properties we return in our mixin come in handy, below the list of posts we include navigation links.
<template>
  <main>
    <h1>Page {{ currentPage }}</h1>
    <ul>
      <li v-for="post in posts" :key="post.slug">
        <nuxt-link :to="`/${post.slug}`"> {{ post.title }} </nuxt-link>
      </li>
    </ul>
    <nav>
      <nuxt-link v-if="!firstPage" :to="`/page/${currentPage - 1}`"
        >← Previous</nuxt-link
      >
      <nuxt-link v-if="!lastPage" :to="`/page/${currentPage + 1}`"
        >Next →</nuxt-link
      >
    </nav>
  </main>
</template>

<script>
  export default {
    props: {
      posts: {
        type: Array,
        required: true,
      },
      currentPage: {
        type: Number,
        required: true,
      },
      firstPage: {
        type: Boolean,
        required: true,
      },
      lastPage: {
        type: Boolean,
        required: true,
      },
    },
  };
</script>
Both our pages/index.vue and pages/page/_page.vue components can now be adjusted to make use of this PostsPage component.
<!-- pages/index.vue -->
<!-- pages/page/_page.vue -->
<template>
  <posts-page
    :posts="posts"
    :currentPage="currentPage"
    :firstPage="firstPage"
    :lastPage="lastPage"
  />
</template>

<script>
  import fetchPostsMixin from "@/utils/fetchPostsMixin";
  import PostsPage from "@/components/PostsPage.vue";

  export default {
    components: { PostsPage },
    mixins: [fetchPostsMixin],
  };
</script>
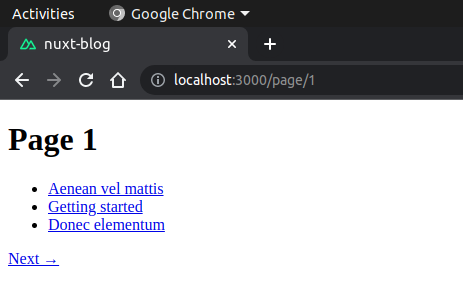
Though, still not at all pretty without any styling it gets the job done:

Order by publishing date
Without adding any sortation the order of posts in our list looks somewhat arbitrary. The most common sortation of your blog posts is likely to be on date in descending order, from newest to older.
For this we need to adjust two things. First, in the Front Matter of all our blog posts we need to specify a publishing date. Second, we need to chain the sortation method when fetching our content.
I'll call this Front Matter variable just "date", you can pick something else like "publishedAt" as well. What is important here is that you stay consistent in defining the variable in all your posts with the same name.
---
title: Getting started
date: 2022-04-30
description: "Empower your NuxtJS application with @nuxt/content module: write in a content/ directory and fetch your Markdown, JSON, YAML and CSV files through a MongoDB like API, acting as a Git-based Headless CMS."
---
Next we need to change how we fetch our posts, therefore we need to be in our mixin. There are two changes that need to be made. Adding the "date" variable to the array we pass in the .only() method and chaining the .sortBy() method with the correct variable name and order.
// utils/fetchPostsMixin.js
export default {
  async asyncData({ $content, params, error }) {
    // ...
    const posts = await $content()
      .only(["slug", "title", "date"])
      .sortBy("date", "desc")
      .limit(POSTS_PER_PAGE)
      .skip(offset)
      .fetch();
    // ...
  },
};
Exclude future posts
Writing blog posts in advance is a common practice. Setting the date variable that we defined in the previous section to a future date is not the problem. However, these posts show up in our list of posts as well.
To filter the list of posts we can include the .where() method, which allows us to filter the content with a MongoDB-like query syntax.
// utils/fetchPostsMixin.js

export default {
  async asyncData({ $content, params, error }) {
    // ...
    const today = new Date().valueOf();
    const posts = await $content()
      .only(["slug", "title", "date"])
      .where({ date: { $lte: today } })
      .sortBy("date", "desc")
      .limit(POSTS_PER_PAGE)
      .skip(offset)
      .fetch();
    // ...
  },
};
Include in static build
One of the great upsides of creating a blog with Nuxt compared to a WordPress to name one is the ability to host your blog cheaply as a static site. This takes little effort, you can publish scheduled posts via a webhook, is extremely scalable, you pay just for the domain name and continues integration to name just a couple upsides.
To generate a static site from your Nuxt project you need to run the command npm run generate. Nuxt version 2.14 introduced a crawler which would gather the needed routes from the links present in your code.
In previous versions parameterized routes were not generated in a static build. If you are for some reason still on an older version and can't upgrade you can configure the generate command to include your content pages as follows in the nuxt.config.js file.
export default {
  target: "static",
  // ...
  generate: {
    async routes() {
      const { $content } = require("@nuxt/content");
      let contentPages = await $content({ deep: true }).only(["path"]).fetch();
      contentPages = contentPages.map((file) =>
        file.path === "/index" ? "/" : file.path
      );
      return contentPages;
    },
  },
};
To actually deploy our static site we can go to Netlify or Vercel for example. I'm going with Netlify here.
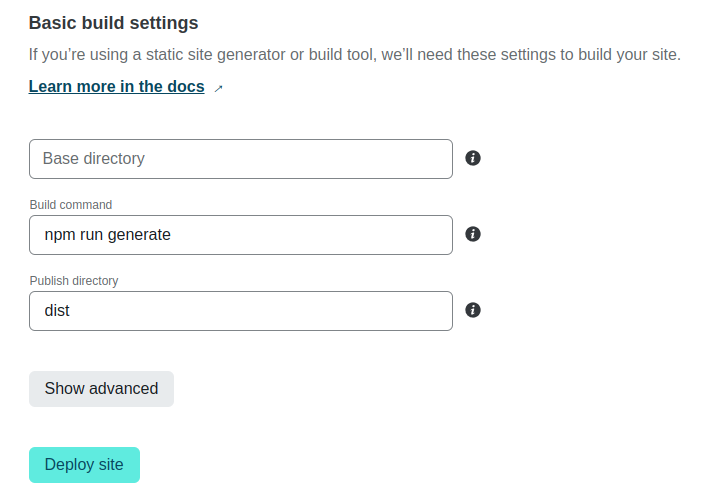
Assumed you created a git repository for your blog you can connect it to a Netlify site. Here you need to make sure you configure the right build command: npm run generate.

Conclusion
Now the content parsing is done there are a couple other concerns you can think about.
You could consider adding some structure to the content/ folder for example. You can pass this subfolder to $content() when fetching posts. See the docs.
Now we serve our blog posts as a slug directly after the root domain. You could consider a routing pattern like ...com/blog/<slug>. To achieve this the page templates should be moved to a blog subfolder in your pages directory.
I left the styling all up to you, to get a head start you can grab the nuxt-content-docs theme as described in the docs.
The final product is available here: